
How to plan deep-sky photos
How big is Andromeda at 200 mm? Will it still be behind that hill? You can check both before setting up your equipment.
01Set your observing location
Find your location on the map and place the crosshair on your actual observing spot. A hill on the horizon can substantially shorten your useful window.
02Choose a catalogue object
Tap “3D” with the cube icon at the top, then the magnifying glass. Here it opens the “Celestial catalogue”, not location search. Search for “M31”, for example, and tap the matching entry to select it for planning.

Select a target from the catalogue to use it in your plan. 03Look for a suitable night
Tap the lightbulb at the top. Set your minimum altitude with minus and plus beside the degree value. Then tap the row naming your object and that altitude. Celeris searches for a dark, moonless window.
04Try focal lengths and orientation
The crosshair icon on the left centres the selected object. Pinch to adjust focal length, starting at 200 mm for Andromeda. The rectangle icon on the right switches orientation. Check how much of the frame the target occupies.
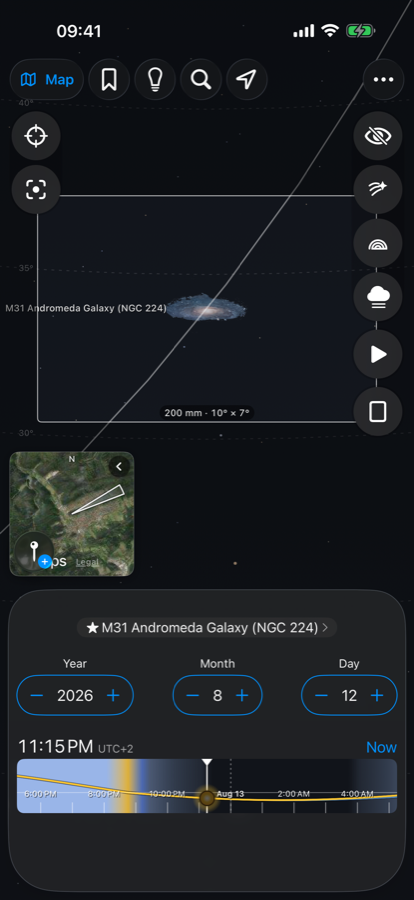
Andromeda in the camera frame: the preview shows angular size, not the image quality you can expect. 05Check the whole session
Move the time through your planned session. Does the object stay clear of the terrain? When does the moon interfere? Save the plan, then work out setup time, tracking and exposure separately.
17 Messier objects have photographic previews; other catalogue objects appear without such an image. The camera frame is full-frame. For smaller sensors, use the equivalent full-frame focal length.